When collaborating in a FeedHive workspace, you have the ability to enable an approval workflow.
In short, this means that given team members must approve a post before it can go live.
In this article, we will take a look at how FeedHive's approval workflow works, and how to set it up.
- Enable approval workflow in your workspace
- Grant team members the ability to approve
- Creating and scheduling posts
- Approving posts
- FAQ
Enable approval workflow in your workspace
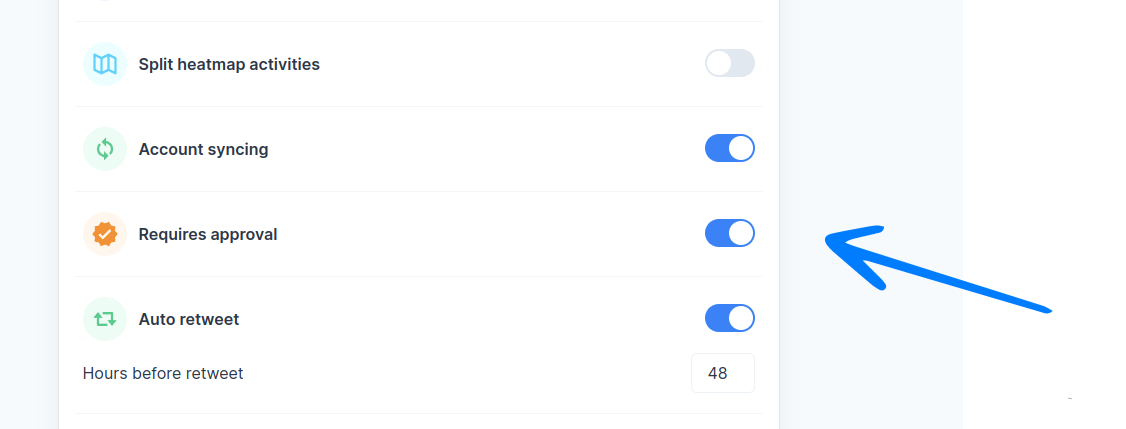
The first thing you need to do, is to enable the approval workflow for a given workspace.
We do this on the Settings page.

Grant team members the ability to approve
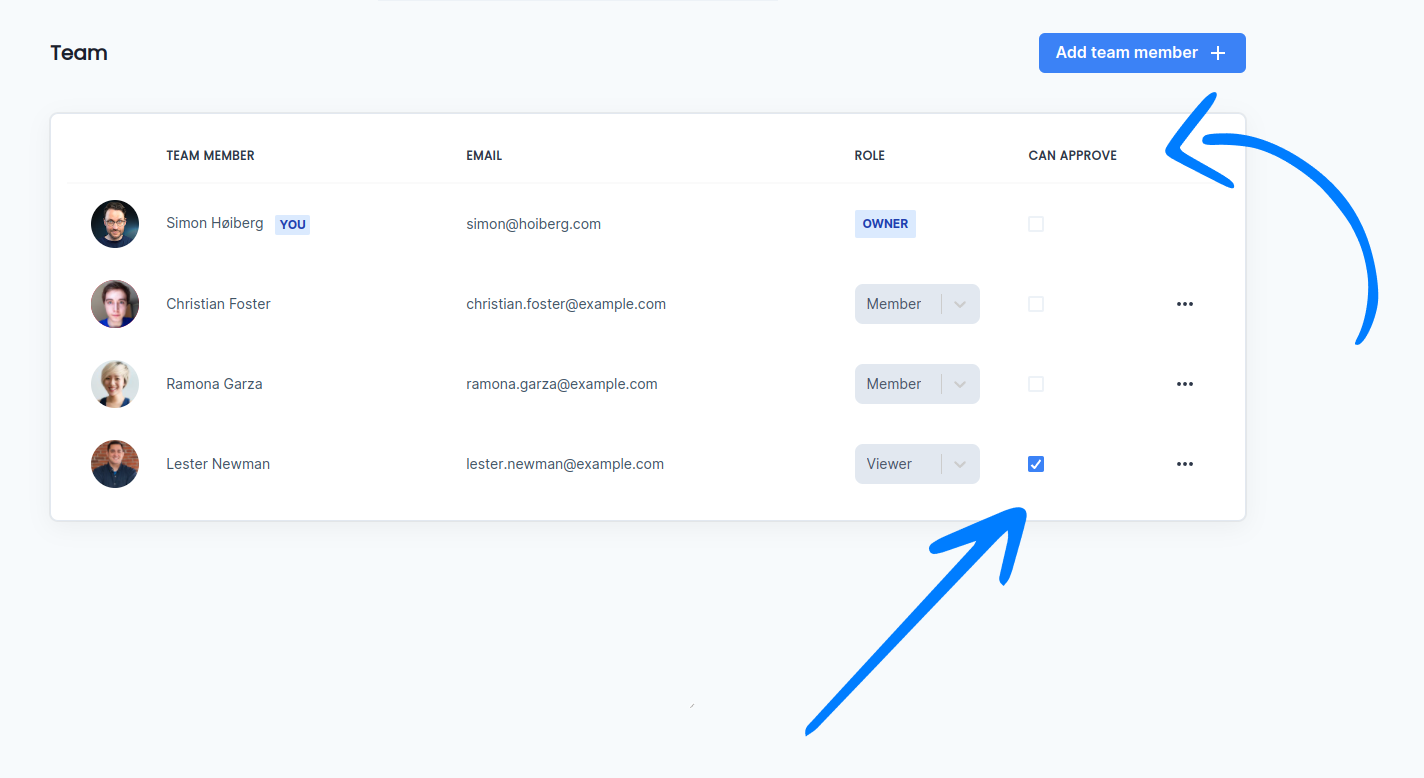
After the approval workflow has been activated, you can now grant individual team members the ability to approve posts.

On the Teams page, you will see a new column, "Can approve", which you can use to grant team members the ability to approve.
The following rules apply:
- Only the owner of the workspace can grant a team member the ability to approve.
- The ability to approve is independent of the role of a team member.
Creating and scheduling posts
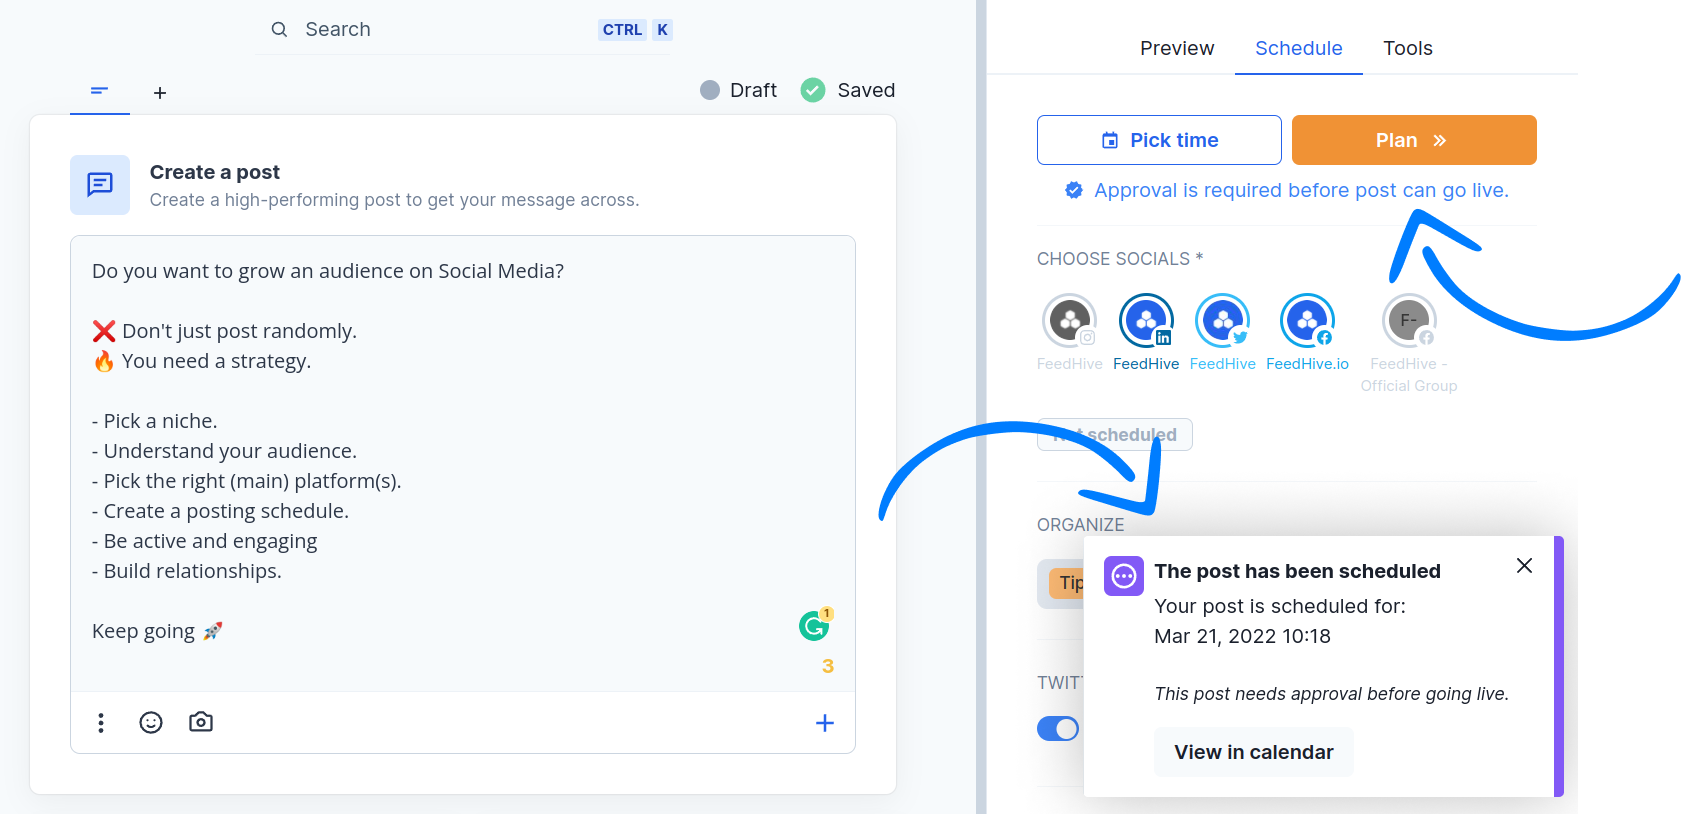
Creating and scheduling a post will feel the same as normally.
The difference is, that as soon you click either schedule or plan, the post automatically enters a state of needing approval.
From here, a team member with the ability to approve posts will need to approve them before the post can go live.

Approving posts
There are multiple ways a post can be approved.
Method one
Go to the Schedule page and see the posts on the calendar.

You will notice the post appearing with a purple border, if they need approval.
If you click on the post, you will also see that is says *"**Needs approval"***in the top, and if you have been granted the ability to approve, you will notice a green Approve button.
Click this button, and you will see the post turning into a regular scheduled post.
The post has been approved 🥳
Method 2
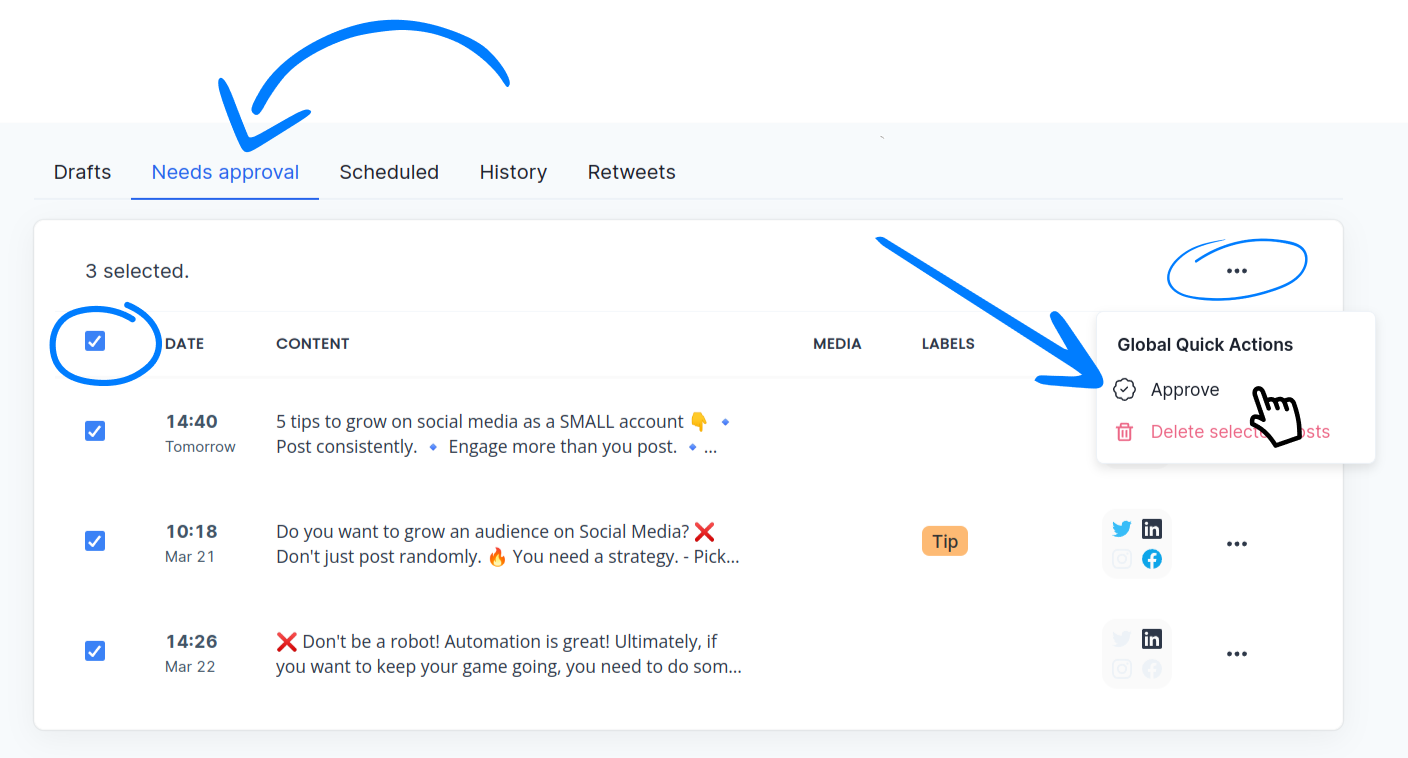
Go to the Posts page and click on the Needs approval tab.

From here, you have multiple options.
- You can click on each posts, then click on the green Approve button.
- You can click on the little "..." button next to each post, then choose Approve.
- You can select multiple posts, then click the "..." button on the top row and pick Approve.
The latter will allow you to approve posts in bulk.
Method 3
Finally, you can also click Edit on a post that needs approval, you will have the ability to approve the post from the Compose page as well.
FAQ
- What happens if I edit a post that has been approved?
- If the user who edits the post has been granted the ability to approve, nothing will happen.
The post will be edited like it normally would. - If the user does not have been granted the ability to approve, the post will be moved back to draft the moment it is edited and will require approval again.
- What happens if I turn off the approval workflow again?
- You can turn off the approval workflow at any given time.
However, if you have posts currently pending approval, they will stay pending and require approval, even after the workflow is turned off.
Any new posts will be scheduled directly after the approval workflow is turned off.